


Get the Most from Your Demo Robot

Getting the Most from Your Demolition Robot
By August Scalici
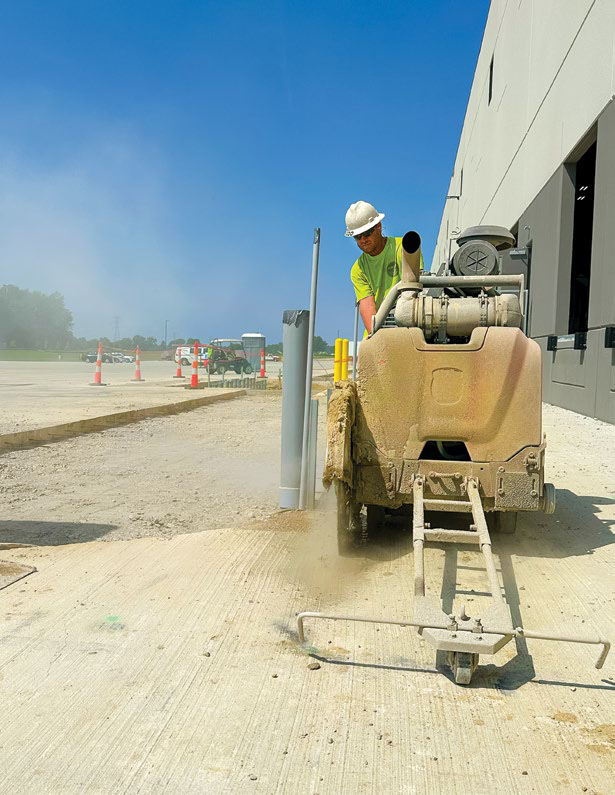
Remote-controlled demolition robots are becoming increasingly popular among concrete cutters around the world. They can be operated in confined spaces, often with limited access, and by their very nature they allow operators to position themselves a safe distance from potential worksite hazards. In addition, most models emit zero emissions. Their very high power-to-weight ratio and precise controls make them an invaluable tool for interior selective demolition jobs. Combined with more traditional cutting and coring operations, they can expand the market for concrete cutters’ services.
Because of their unique capabilities, demolition robots are frequently placed in quite challenging and rigorous situations. If attention isn’t paid to some basic preventative maintenance routines, their availability can be affected.
Always consult the manufacturer’s manuals for proper guidance and direction for the proper operation, maintenance procedures and protocols of the robot. The intention of this article is to offer focused tips and advice based on years of experience in the field in hundreds of different applications. Used in conjunction with the recommended procedures, these suggestions should increase uptime and help users truly get the best out of demolition robots.
The single most important factor for demolition robot reliability is maintaining a clean electrical supply. For a detailed and comprehensive review of electrical issues that can affect the operation of a demolition robot, please refer to the Tech Talk article published in the September 2013 issue of Concrete Openings.
Like any piece of construction equipment, a demolition robot is only as good as the pins, bushings and shafts that are in constant motion while it is in operation. If basic preventative maintenance is neglected, there can be a cascade effect which can ultimately lead to cracks in the arm system. Again, a simple daily inspection can pay enormous dividends in the life of a machine.
Start with the quick-hitch. With the machine turned on and an attachment (i.e. hammer) mounted, lift the arm slightly off the ground, and swing it sharply to each side to check for excessive play. If there is too much movement, this could mean that the wedge holding the assembly is either too loose or that it has worn out. Either tighten it or replace it.
While demolition robots are designed to handle the forces that hydraulic hammers can generate, it is still important to maintain the three-piece boom system on a regular basis. Working up the arm from the quick-hitch, check for obvious cracks in the welds, where the shafts go through the bosses and on the reinforcing plates. Also check for loose bolts, which, if left uncorrected, will eventually lead to stresses that can eventually cause cracking. A simple way to check is to look for signs of wear where the hex head of the bolt has moved against the metal surface of the bushing. If there is space between the hex head and the metal surface, or even worse, the bolt’s thread, it is time to tighten things up—consult the operating manual for settings.
Vibrations generated by the hammer travel up the boom system and can never be entirely eliminated. The pins and shafts, plates and bosses are all designed to accommodate these vibrations, but are only effective if the bolts are tight and properly torqued. The key is to minimize any ‘slop’ in the arms. This maintains the machine’s responsiveness and efficiency.
The undercarriage is a key sub-assembly of any demolition robot and critical for the successful application of the machine in a variety of ground conditions. A daily visual inspection of the drive motor, rollers and idler to check for excessive wear, lodged debris or misalignment is a must. More important, check that the tracks are properly tensioned. Check the owner’s manual for the correct guidelines, but veteran operators will often be able to tell by eye—by the amount of sag in the tracks—whether they are good to go.
The daily inspection should proceed in tandem with lubrication. Demolition robots come equipped with multiple grease points, and while some need daily attention and others weekly, all are important. Perhaps the most important area to address on a daily basis is the linkage where the dipper arm meets the quick hitch/attachment. This area is subject to the highest stresses and should be carefully monitored and regularly greased. While experts would never recommend ignoring the other grease-points on the machine, they might well quietly confirm that if only one area was to be greased it should be this linkage area.
Finally, keep an eye on fluid levels. When low, the hydraulic tank should be topped up with the manufacturer’s recommended oil. Always use the robot’s filtration system when filling the tank to prevent contaminated oil from entering the system.
There are a number of mechanical and electrical checkpoints to include in a weekly routine inspection. Start with the automatic grease levels—if they are low, either replace the cartridge or refill the canister.
Remove the side panels on the turret and check for any hydraulic oil leaks around the main valve body, pump, tank and cooler area. Occasionally, concrete or other debris can find its way into this space. With hydraulic oil pulsing through the hoses at high pressure, chafing can occur, which if left unchecked can lead to hose failure. Look for evidence of any excess oil in the area or signs of damage to the hoses.
This is also a good time to check the radiator and clear away any accumulated dust and debris that could potentially reduce the machine’s ability to cool the hydraulic oil properly. Overheating can stop a demolition robot in its tracks, often at the most inopportune times.
After making certain that the power to the machine is turned off at its source, and the machine is unplugged and de-energized, open the electrical cabinet, check for any loose connections and ensure that all components are securely in their proper places. Next, inspect the ‘pigtail’—the short length of cable at the back of the machine that connects to the main electrical cable. Take apart the plug and make sure that the wires into the terminals are properly tightened. Check that the male prongs on the plug are in good condition.
With the demolition robot plugged back in, check the control cable—the ‘umbilical cord’ that connects the machine to the control box in the event of loss of battery power. To make sure that control cable is functioning properly, connect it to the control box, remove the battery and run through each function of the demolition robot, including arm system and undercarriage. While demolition robots are designed to be wirelessly operated, the control cable is there primarily as a safety measure. In the event the battery in the control box runs out and there isn’t a spare to hand, the control cable can be connected and a machine that would otherwise be stranded in place can still be moved out of harm’s way. Other times, it is handy to be able to run the machine normally using the control cable when the battery runs out unexpectedly.
A demolition robot’s control box often takes a beating. As it is light and portable, the control box is sometimes treated a little too casually and can end up being tossed around. A simple test to see if there is anything wrong with a control box, is to pick it up and gently shake it. Any suspicious rattles indicate that it is time to open it up, investigate and make sure that all components are securely in place.
Almost all demolition robots are shipped with a hydraulic breaker (or hammer) as standard. Along with crushers, buckets, grapples and shears, hammers are among the most popular attachments for these versatile machines.
Demolition robots are often used on walls and ceilings. The three-arm boom system lends itself well to applying force in the vertical and overhead configuration. One helpful tip to prolong the life of a hammer, is to fashion a ‘boot’ to provide some extra protection when hammering overhead. Take a thick rubber mat—an old tire recap works well—and use a reciprocating saw to cut it to size: a square piece that should extend only slightly beyond the lower dimension of the hammer. As an example, based on one commonly-used hammer, the square of rubber should be about 8 inches by 8 inches. Then, using a hole saw, cut a hole in the middle of about 0.125-inch less than the diameter of the point or chisel being used. Slide the rubber mat over the chisel and down the shaft to the bushing. This crude but effective shield will prevent a surprising amount of debris and even small particles of concrete from working their way into the hammer, past the seal assembly.
Another way to prolong the life of a hammer is to ensure the proper grease is used—or more accurately, chisel paste—to lubricate the point or chisel. This often neglected area may be the single most critical thing a contractor can do to prevent premature wear on a hammer. Most demolition robots come equipped with an auto-greasing function, but if the cartridge is spent or the canister empty, it might as well not be there at all. The easiest way to check to see if the greasing system is operating properly, is to look for evidence where the chisel meets the hammer. There should be a visible thin film of grease there. If this film is absent, make sure the pump is operating or that there is sufficient grease in the system. The grease itself is also critical. Again, follow the manufacturer’s guidelines but most will recommend an actual chisel paste. This has a much higher breakdown point than traditional grease and often contains materials like copper and graphite. These materials form into ‘micro-ball bearings’ as the chisel moves up and down in the housing.
More than most pieces of construction equipment, a demolition robot must cope with enormous stresses and vibrations relative to its size. Without regular preventative maintenance, these machines will succumb to those forces and suffer untimely downtime. By incorporating these simple preventive maintenance routines and other techniques, contractors can ensure they truly get the best out of these machines for many years.

